Repost - Building IPSec VPN with Strongswan
This article is mainly a backup of an article that has been stored on my note-taking app, Wiz Note. I do not know who the original author is, but every time I install Strongswan, I refer to this article. It is very detailed and easy to follow. If the author sees this, please comment below and I will add the repost link. This article will now be based on CentOS instead of Ubuntu, while retaining the original Ubuntu style for the convenience of the original author’s reference. It will also include examples based on the actual operations of Linode Japan2.(English version Translated by GPT-3.5, 返回中文)
There was a very good tutorial on building an IKEv2 VPN with Strongswan on nsshell.com. However, it seems that nsshell.com is down (I can’t access it). So, I decided to repost the tutorial here. There were one or two omissions in the original article, and I will add them.
Software
Strongswan 5.7.2 MD5: d449aa1936218a42e34c32494947308b Official download RuterFu My Storage
Prerequisites:
VPS or server with sufficient RAM (96MB RAM is enough, 64MB RAM not tested)
Can be OpenVZ, but pay attention to the special steps for OpenVZ mentioned in the tutorial.
This article uses Linode Japan2 server as the installation environment, CentOS 7.6 system
p.s. Linode costs just a few cents for installation, even though it costs more than 20 dollars…

The ping is as unstable as ever…

System version attached
1 | [root@li****-18 ~]# cat /etc/centos-release |
Process
Preparation
Please install CentOS operating system on the virtual machine or server, both 32-bit and 64-bit are fine. This article uses version 7.6. Execute the following command to install the PAM library and SSL library on the system.
1
yum install pam-devel openssl-devel make gcc wget -y
Download the latest Strongswan source code
1
2
3
[root@li****-18 ~]# wget -c https://download.strongswan.org/strongswan-5.7.2.tar.gz
[root@li****-18 ~]# tar -zxvf strongswan-5.7.2.tar.gz
[root@li****-18 ~]# cd strongswan-5.7.2Compilation
Execute this if using OpenVZ
1
2
3
4
5
6./configure --enable-eap-identity --enable-eap-md5 --enable-eap-mschapv2 \
--enable-eap-tls --enable-eap-ttls --enable-eap-peap --enable-eap-tnc \
--enable-eap-dynamic --enable-eap-radius --enable-xauth-eap \
--enable-xauth-pam --enable-dhcp --enable-openssl --enable-addrblock \
--enable-unity --enable-certexpire --enable-radattr --enable-tools \
--enable-openssl --disable-gmp --enable-kernel-libipsecExecute this for other servers (executed in this article)
1
2
3
4
5
6
./configure --enable-eap-identity --enable-eap-md5 --enable-eap-mschapv2 \
--enable-eap-tls --enable-eap-ttls --enable-eap-peap --enable-eap-tnc \
--enable-eap-dynamic --enable-eap-radius --enable-xauth-eap --enable-xauth-pam \
--enable-dhcp --enable-openssl --enable-addrblock --enable-unity \
--enable-certexpire --enable-radattr --enable-openssl --disable-gmp \
--prefix=/usr/local/strongswanIf the output is as follows, it means successful
1
2
3
4
5
6
7
8
9
10
11
12
13..........
config.status: creating config.h
config.status: executing depfiles commands
config.status: executing libtool commands
strongSwan will be built with the following plugins
-----------------------------------------------------
libstrongswan: aes des rc2 sha2 sha1 md5 random nonce x509 revocation constraints pubkey pkcs1 pkcs7 pkcs8 pkcs12 pgp dnskey sshkey pem openssl fips-prf curve25519 xcbc cmac hmac
libcharon: attr kernel-netlink resolve socket-default stroke vici updown eap-identity eap-md5 eap-mschapv2 eap-dynamic eap-radius eap-tls eap-ttls eap-peap eap-tnc xauth-generic xauth-eap xauth-pam dhcp certexpire radattr addrblock unity counters
libtnccs: tnc-tnccs
libtpmtss:
[root@li****-18 strongswan-5.7.2]#Wait for the compilation process to finish and then execute the following command (the make command will compile the source code, and it may take some time depending on the host performance):
1
make && make install
Wait patiently for the compilation, the time required for compilation varies depending on performance.
Create environment variables
Go to the
/usr/local/strongswan/sbin/directory1
[root@li****-18 strongswan-5.7.2]# cd /usr/local/strongswan/sbin/
Make a note of this directory and then edit
/etc/profile, addexport PATH=/usr/local/strongswan/sbin:$PATH1
2
3
4vi /etc/profile
追加
export PATH=/usr/local/strongswan/sbin:/usr/local/strongswan/bin:$PATH
按:wq保存并退出Activate the environment variables
source /etc/profile1
2
3
4
5
6
7
8
9[root@li****-18 sbin]# source /etc/profile
[root@li****-18 sbin]#
这时候运行ipsec version就会出现以下内容
[root@li****-18 sbin]# ipsec version
Linux strongSwan U5.7.2/K3.10.0-957.el7.x86_64
University of Applied Sciences Rapperswil, Switzerland
See 'ipsec --copyright' for copyright information.
[root@li****-18 sbin]#
Configure Strongswan and certificates
Generate CA certificate, generate private key
1
2在这里之前建议到一个新的目录, 我这里选择/home/ssl目录(自己创建), 然后接着以下命令
ipsec pki --gen --outform pem > ca.pemSign the CA certificate with the private key
1
ipsec pki --self --in ca.pem --dn "C=com, O=myvpn, CN=VPN CA" --ca --outform pem >ca.cert.pem
Server certificate, generate private key
1
ipsec pki --gen --outform pem > server.pem
Issue the server certificate with the CA certificate
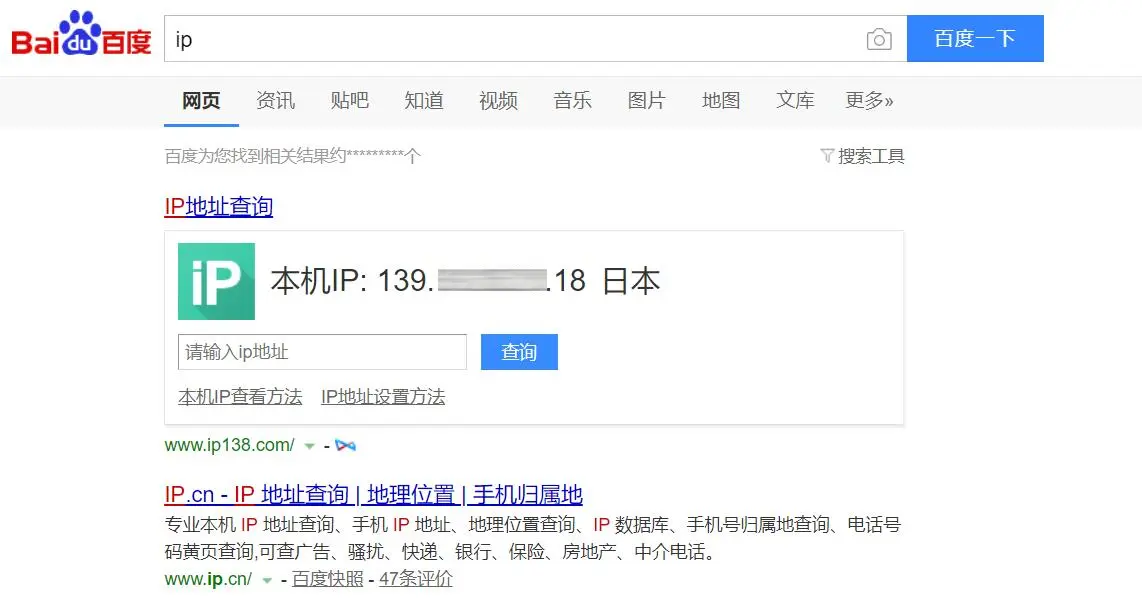
First, confirm the IP address or domain name used to access the server. Only use this address when connecting, do not use any other address. Replace 123.123.123.123 in the following command with the IP address or domain name of your own server. You need to replace it in two places.1
2
3
4ipsec pki --pub --in server.pem | ipsec pki --issue --cacert ca.cert.pem \
--cakey ca.pem --dn "C=com, O=myvpn, CN=123.123.123.123" \
--san="123.123.123.123" --flag serverAuth --flag ikeIntermediate \
--outform pem > server.cert.pemClient certificate, generate private key
1
ipsec pki --gen --outform pem > client.pem
Sign the client certificate with the CA
1
ipsec pki --pub --in client.pem | ipsec pki --issue --cacert ca.cert.pem --cakey ca.pem --dn "C=com, O=myvpn, CN=VPN Client" --outform pem > client.cert.pem
Generate the pkcs12 certificate
1
2
3
4
5
6
7
8
9
10
11
12
13
14
15
16
17
18
19openssl pkcs12 -export -inkey client.pem -in client.cert.pem -name "client" -certfile ca.cert.pem -caname "VPN CA" -out client.cert.p12
这里需要输入密码, 随便输入一个即可, 注意2次密码要一致, 至此, 运行的命令如下
[root@li****-18 sbin]# cd /home
[root@li****-18 home]# mkdir ssl
[root@li****-18 home]# cd ssl
[root@li****-18 ssl]# ipsec pki --gen --outform pem > ca.pem
[root@li****-18 ssl]# ipsec pki --self --in ca.pem --dn "C=com, O=myvpn, CN=VPN CA" --ca --outform pem >ca.cert.pem
[root@li****-18 ssl]# ipsec pki --gen --outform pem > server.pem
[root@li****-18 ssl]# ipsec pki --pub --in server.pem | ipsec pki --issue --cacert ca.cert.pem \
> --cakey ca.pem --dn "C=com, O=myvpn, CN=139.***.***.18" \
> --san="139.***.***.18" --flag serverAuth --flag ikeIntermediate \
> --outform pem > server.cert.pem
[root@li****-18 ssl]# ipsec pki --gen --outform pem > client.pem
[root@li****-18 ssl]# ipsec pki --pub --in client.pem | ipsec pki --issue --cacert ca.cert.pem --cakey ca.pem --dn "C=com, O=myvpn, CN=VPN Client" --outform pem > client.cert.pem
[root@li****-18 ssl]# openssl pkcs12 -export -inkey client.pem -in client.cert.pem -name "client" -certfile ca.cert.pem -caname "VPN CA" -out client.cert.p12
Enter Export Password:
Verifying - Enter Export Password:
[root@li****-18 ssl]#Install the certificate
1
2
3
4
5cp -r ca.cert.pem /usr/local/strongswan/etc/ipsec.d/cacerts/
cp -r server.cert.pem /usr/local/strongswan/etc/ipsec.d/certs/
cp -r server.pem /usr/local/strongswan/etc/ipsec.d/private/
cp -r client.cert.pem /usr/local/strongswan/etc/ipsec.d/certs/
cp -r client.pem /usr/local/strongswan/etc/ipsec.d/private/Certificate installation is complete, next configure Strongswan, edit
/usr/local/strongswan/etc/ipsec.confIt is recommended to backup the original file before performing the following operations
1
2
3
4
5
6
7
8
9
10
11
12
13
14
15
16
17
18
19
20
21
22
23
24
25
26
27
28
29
30
31
32
33
34
35
36
37
38
39
40
41
42
43
44
45
46
47
48
49
50
51
52
53
54
55config setup
uniqueids=never
conn iOS_cert
keyexchange=ikev1
# strongswan version >= 5.0.2, compatible with iOS 6.0,6.0.1
fragmentation=yes
left=%defaultroute
leftauth=pubkey
leftsubnet=0.0.0.0/0
leftcert=server.cert.pem
right=%any
rightauth=pubkey
rightauth2=xauth
rightsourceip=10.31.2.0/24
rightcert=client.cert.pem
auto=add
conn android_xauth_psk
keyexchange=ikev1
left=%defaultroute
leftauth=psk
leftsubnet=0.0.0.0/0
right=%any
rightauth=psk
rightauth2=xauth
rightsourceip=10.31.2.0/24
auto=add
conn networkmanager-strongswan
keyexchange=ikev2
left=%defaultroute
leftauth=pubkey
leftsubnet=0.0.0.0/0
leftcert=server.cert.pem
right=%any
rightauth=pubkey
rightsourceip=10.31.2.0/24
rightcert=client.cert.pem
auto=add
conn windows7
keyexchange=ikev2
ike=aes256-sha1-modp1024!
rekey=no
left=%defaultroute
leftauth=pubkey
leftsubnet=0.0.0.0/0
leftcert=server.cert.pem
right=%any
rightauth=eap-mschapv2
rightsourceip=10.31.2.0/24
rightsendcert=never
eap_identity=%any
auto=addEdit
/usr/local/strongswan/etc/strongswan.conf1
2
3
4
5
6
7
8
9
10
11
12charon {
load_modular = yes
compress = yes
plugins {
include strongswan.d/charon/*.conf
}
dns1 = 8.8.8.8
dns2 = 8.8.4.4
nbns1 = 8.8.8.8
nbns2 = 8.8.4.4
}
include strongswan.d/*.confEdit the username and password in
/usr/local/strongswan/etc/ipsec.secrets1
2
3
4: RSA server.pem
: PSK "[预共享密钥]"
: XAUTH "[预共享密钥]"
[用户名] %any : EAP "[密码]"Note that you need to edit the “Pre-shared key” to a unique and confidential string in both the PSK and XAUTH fields. Replace
[username]with the desired username and[password]with the desired password (remove the square brackets). You can add multiple lines to have multiple users.
Modify system forwarding and firewall configuration
Edit
/etc/sysctl.conf, remove the # in front ofnet.ipv4.ip_forward=1, save it and executesysctl -p, the output should be as follows1
2
3
4[root@li****-18 etc]# vi /etc/sysctl.conf
[root@li****-18 etc]# sysctl -p
net.ipv4.ip_forward = 1
[root@li****-18 etc]#Next, modify iptables.
Execute this if using OpenVZ
1
2
3
4
5
6
7
8
9
10iptables -A FORWARD -m state --state RELATED,ESTABLISHED -j ACCEPT
iptables -A FORWARD -s 10.31.2.0/24 -j ACCEPT
iptables -A INPUT -i venet0 -p esp -j ACCEPT
iptables -A INPUT -i venet0 -p udp --dport 500 -j ACCEPT
iptables -A INPUT -i venet0 -p tcp --dport 500 -j ACCEPT
iptables -A INPUT -i venet0 -p udp --dport 4500 -j ACCEPT
iptables -A INPUT -i venet0 -p udp --dport 1701 -j ACCEPT
iptables -A INPUT -i venet0 -p tcp --dport 1723 -j ACCEPT
iptables -A FORWARD -j REJECT
iptables -t nat -A POSTROUTING -s 10.31.2.0/24 -o venet0 -j MASQUERADEExecute this for other servers
1
2
3
4
5
6
7
8
9
10iptables -A FORWARD -m state --state RELATED,ESTABLISHED -j ACCEPT
iptables -A FORWARD -s 10.31.2.0/24 -j ACCEPT
iptables -A INPUT -i eth0 -p esp -j ACCEPT
iptables -A INPUT -i eth0 -p udp --dport 500 -j ACCEPT
iptables -A INPUT -i eth0 -p tcp --dport 500 -j ACCEPT
iptables -A INPUT -i eth0 -p udp --dport 4500 -j ACCEPT
iptables -A INPUT -i eth0 -p udp --dport 1701 -j ACCEPT
iptables -A INPUT -i eth0 -p tcp --dport 1723 -j ACCEPT
iptables -A FORWARD -j REJECT
iptables -t nat -A POSTROUTING -s 10.31.2.0/24 -o eth0 -j MASQUERADESince CentOS 7’s firewall is handled by firewall-cmd, use firewall-cmd for configuration here.
Reference article: IPSEC VPN on Centos 7 with StrongSwan
1
2
3
4
5
6
7
8firewall-cmd --zone=dmz --permanent --add-rich-rule='rule protocol value="esp" accept'
firewall-cmd --zone=dmz --permanent --add-rich-rule='rule protocol value="ah" accept'
firewall-cmd --zone=dmz --permanent --add-port=500/udp
firewall-cmd --zone=dmz --permanent --add-port=4500/udp
firewall-cmd --permanent --add-service="ipsec"
firewall-cmd --zone=dmz --permanent --add-masquerade
firewall-cmd --set-default-zone=dmz
firewall-cmd --reloadNext (common part), save the iptables configuration and configure it to load automatically on startup. If you are using firewall-cmd configuration, skip this step.
1
2
3
4
5
6
7
8
9
10
11
12
13iptables-save > /etc/iptables.rules
将以下内容保存到/etc/rc.local
iptables-restore < /etc/iptables.rules
chmod +x /etc/rc.d/rc.local
以上命令如下
[root@li****-18 etc]# iptables-save > /etc/iptables.rules
[root@li****-18 etc]# vi /etc/rc.local
保存上面 iptables-restore这一段, :wq保存并退出
[root@li****-18 etc]# chmod +x /etc/rc.d/rc.local
[root@li****-18 etc]#
Start Strongswan
1
2
3
[root@li****-18 etc]# ipsec start
Starting strongSwan 5.7.2 IPsec [starter]...
[root@li****-18 etc]#Try connecting
Windows Phone: I don’t have the device, so I won’t provide an example.
For Windows Phone 8.1, install ca.cert.pem, go to Settings -> VPN -> Add IKEv2 Connection, the address should be the same as the one in the certificate. Connect using username and password.
Windows
The connection process for Windows is the same, but note that the certificate should be imported into the local computer’s “Trusted Root Certification Authorities” instead of the current user’s “Trusted Root Certification Authorities”.
Safely copy the server’s
ca.cert.pemto a local directoryOpen Run with Win + R, enter mmc

File -> Add/Remove Snap-in
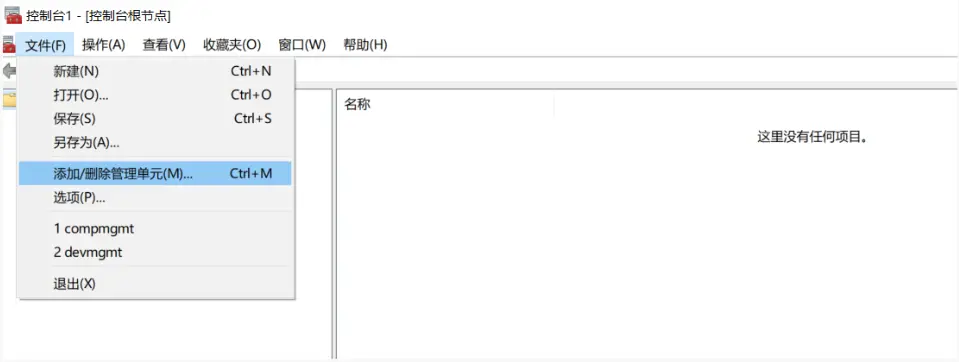Add Certificates -> Computer Account -> Local Computer (the computer running this console) -> OK
Open Certificates -> Trusted Root Certification Authorities -> Right-click on the certificate -> All Tasks -> Import
Import ca.cert.pem, File -> Import all certificates into the Trusted Root Certification Authorities -> Finish
Open Settings -> Network & Internet -> VPN -> Add a VPN connection
1. VPN Provider - Windows (built-in)
2. Connection Name - Any name
3. Server Name or Address - Enter the server’s IP address
4. VPN Type - IKEv2
5. Type of Sign-in info - Username and password (do not select Certificate)
6. Username, Password - Enter the server’s username and passwordClick Connect, the connection should be successful, but internet access may not work yet
At this point, Windows is not yet using the VPN. After checking, it is determined that Windows 10 will default to enabling
Split-Tunneling, causing traffic to not go through the VPN. The solution is as follows:
Reference official documentation: Introduction to strongSwan: Forwarding and Split-Tunneling
Reference article: WIN10能连上VPN,却无法访问网页
1. Open PowerShell and enter the command: `Set-VpnConnection "Connection Name from Step 7" -SplitTunneling 0` 2. Follow the steps in [WIN10能连上VPN,却无法访问网页](https://blog.csdn.net/gaojinshan/article/details/51249147) to solve the problem- After the problem is resolved, connect again to complete the setup.
iPhone
For iOS/Android/Mac OS X devices, add a Cisco IPSec PSK connection. The pre-shared key is the string after PSK in
/usr/local/strongswan/etc/ipsec.secrets(without quotes). Use any domain name or IP to connect, no certificates are required.Mac Connection


